How To Create A Facebook Author Page
This step-by-step tutorial shows aspiring writers how to create and set-up a professional author page on Facebook. Learn how to edit your 'About' section, link your page to your website, upload your profile picture and timeline cover, how to invite others to like your page, and so much more.


Create Your Page
First, you will want to log into your Facebook account. Once you are logged into your Facebook account you will want to hit the down arrow in the top right corner of your Facebook page. After you have clicked on the down arrow you will want to:
Click on Manage Pages if you already are managing a Facebook page.
Or if you currently do not have any Business Pages you will hit Create Page.

After clicking on Manage Pages (if you are already currently managing pages) you will be brought to another page where you can see all the different pages you manage. At the top, there is the Create A Page button. Click on that.

Another method to create a business account is from your Facebook home page, on the left sidebar under the text saying Explore. Click on the Pages tab.

Next You will be brought to a page where you can see all the pages you manage. From this page, you can click the green button in the top right corner that says Create A Page.


Choose Your Business Type
After clicking on Create A Page you will be prompted to choose what type of business Facebook Page you would like to create. Either a Business or Brand? Or a Community Or Public Figure. As a writer, you will most likely choose the Community or Public Figure. Remember as an Author you are a public figure now.

Create Your Page Name and Select a Catagory
Once you have chosen Community or Public Figure you will need to enter your page name. As an author, you will want to make sure that your page name matches what is on your books. Enter either your real name, or your pen name.
Next, Facebook will ask you to choose a category. As a writer, you will most likely want to choose Author.

Upload a Profile Picture
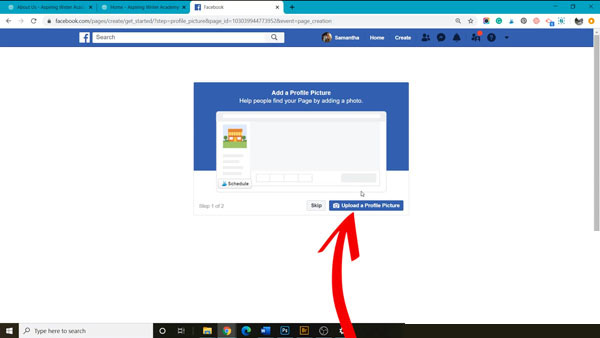
The next step is to select Upload a Profile Picture. As an author, this would be a professional headshot. You do not want a grainy pixilated photo or a selfie. Remember this page will be seen by fans and editors and while it is easy to hide away behind your book cover, people connect better with the real you. It is also more professional to have a crisp, clear, high-resolution headshot.
Upload a Timeline Cover
After uploading your profile picture you will be asked to upload a Timeline Cover. If you currently do not have a timeline cover ready to go you can hit skip and come back to it another time.
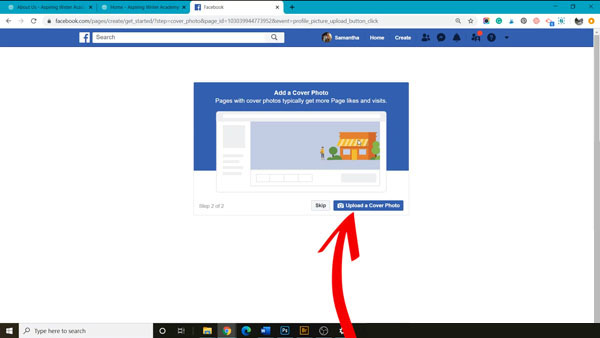
If you are already published, you may want your timeline cover designed to display your book cover. However, vertical book cover may have the text cut off without proper formatting. You can hire a professional graphic designer or make a timeline cover yourself with either Canva or Adobe Photoshop. If you are just getting started on building your author brand you can just put your logo and tagline.
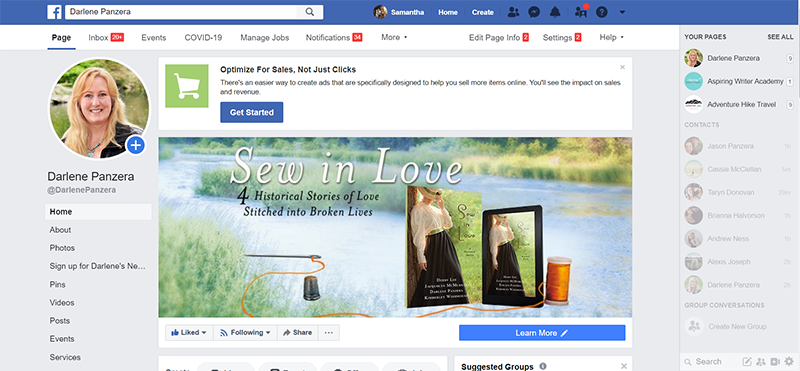
If you hit Skip on uploading a timeline cover you can upload a cover later. On your new Author Facebook Page, you can hover the mouse over your timeline cover and click either:
Choose From Photos
Choose From Videos
Upload Photos/Video
Create a Slideshow
You also get options to Reposition your cover or Remove your timeline cover.

Create a Page Username
After creating your Facebook page timeline cover you will want to create a Page Username. Page usernames make it easy for people and other pages to tag your page in a post. This can potentially lead you to get more traffic to your page so you can gain more fans.
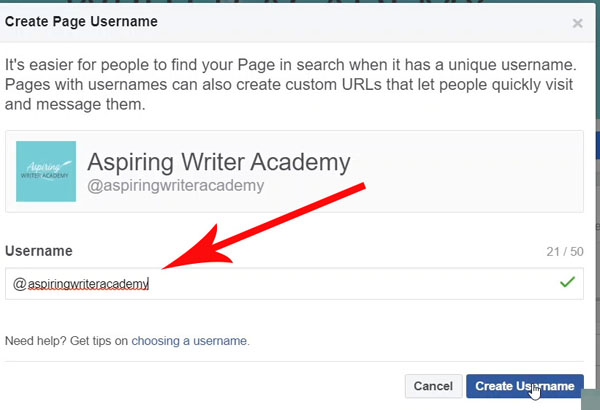
To get started click Create Page @username right below your author profile pic.
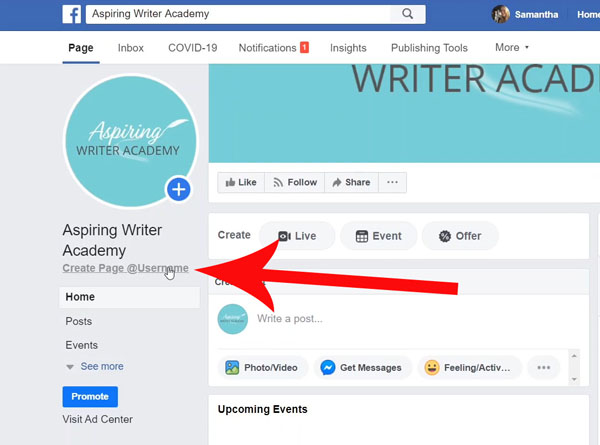
Your page username is all one word with no spaces following the @ symbol. Your page username should match your real name or author pen name. After you have entered your username click Create Username button.
Add a Button to Your Website
If you already have a website you will want to connect it to your Facebook Author Page. By connecting your website to your Facebook author page you make it super easy for your fans on social media to visit your website. You can do this by clicking on + Add a Button.

After you have clicked on + Add a Button you will want to choose Learn More About Your Business. Then click the Learn More button. Once the Learn More button is selected click Next.


Copy and paste your website URL and then hit Save.


Edit Your 'About' Section
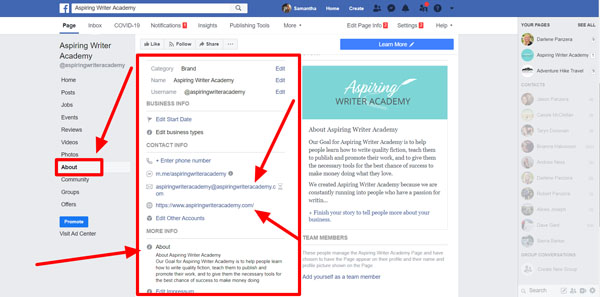
On your business profile home page on the left-hand sidebar, you can see your About section. If you do not immediately see About, click See More, and then you should see About. Once you are in your About section, you can enter your website URL, Email (where people can contact you), Awards you may have won, and a short Author Bio.
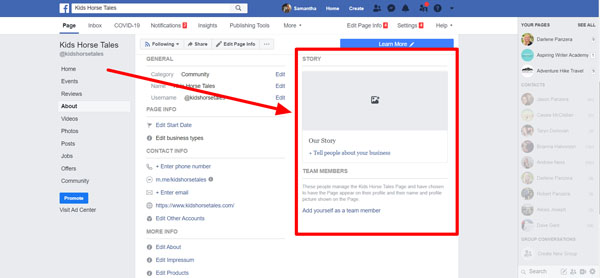
Edit Your Story
Your story can be much longer than the short author bio that you put in your About section. This is where you can share your journey as a writer and provide fun information that your readers may want to know about you.
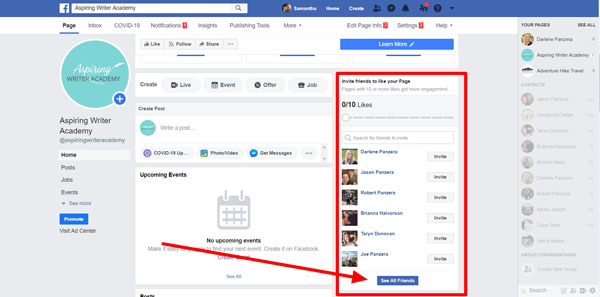
Invite Your Friends and Family
The final step is to invite your friends and family to Like your new Business Author Facebook Page.

Access Additional Page Settings to Edit
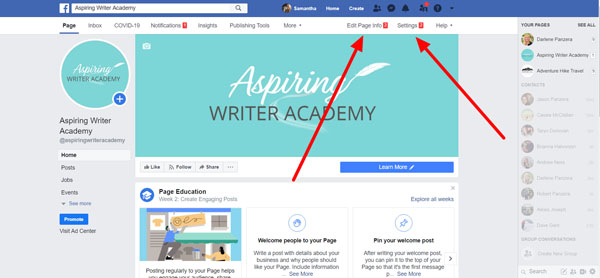
Another way to make changes is to access Edit Page Info which is located on the top bar. Or click on the Settings tab.
How To Create A Facebook Author Page
Source: https://www.aspiringwriteracademy.com/how-to-create-and-set-up-a-professional-author-page-on-facebook/
Posted by: cintroninted1943.blogspot.com

0 Response to "How To Create A Facebook Author Page"
Post a Comment